Week 3 - UV Mapping
- Moksh Shah
- Nov 6, 2022
- 3 min read

Updated: Nov 22, 2022
3rd week started with us diving into UV Mapping. I've always found UV Mapping daunting when I tried doing it first in blender while modelling isometric space. In that I wanted to UV Map plants texture onto a potted plant. I struggled a lot at that time in unwrapping UV and how to go from there. However, after this lecture and all the resources provided by Richard made lot of sense as I delve deeper into the concept of UV Mapping.
UV Mapping is unwrapping 3D Model on 2-dimension plane for setting up textures on the model surfaces.

There are some rules for UV Mapping such as if you modify the object in your workspace, it won't have any effect on the UV shells and vice versa
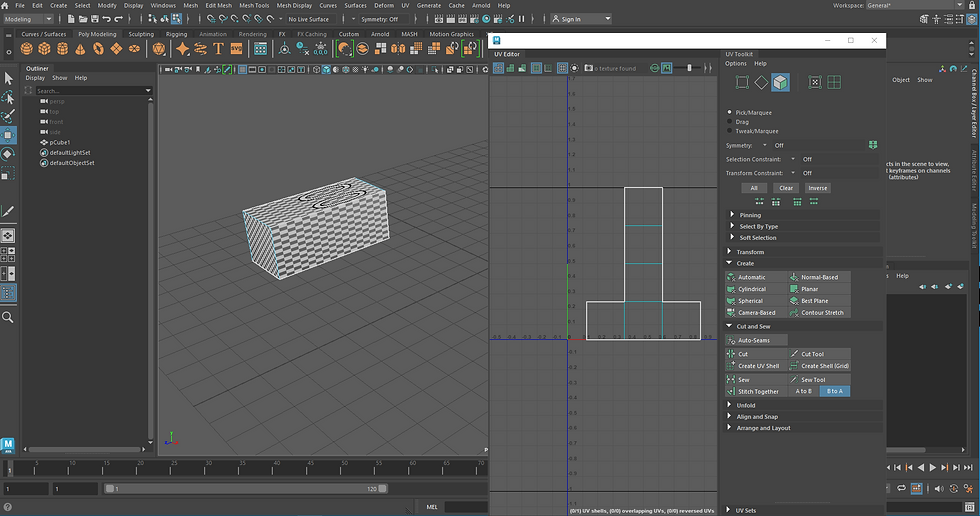
For practice we were provided with an asset file of wooden planks where we learned about automatic UV projections. On simple models automatic projections are not an issue but if there are complex models the UV Map of such models gets complicated with seams and texel densities.

Texel Density is basically the pixel density which determines the resolution of the texture which you will project on the surface. The higher the density which means the smaller the squares here the higher the resolution is. The lower the density the resolution is low resolution.


Now, to have same texel density in all the faces of the surface is really important to have correct flow of texture. If the UV shells of each face have different density, then you select one shell and go in transform menu on right hand side and select get. After that you select all the other shells and select set to have same density as first shell.
Next part to have correct flow of texture on all faces is to have a continuous flow of pixels on all faces of the object. For that we have to go in edge mode and select the edges of the shells and select stitch together option to connect the shells. There is another option too, sew, however if we select that option both the edges will stretch and meet in the middle to meet but in stitch together option it will bring one shell to the other one.

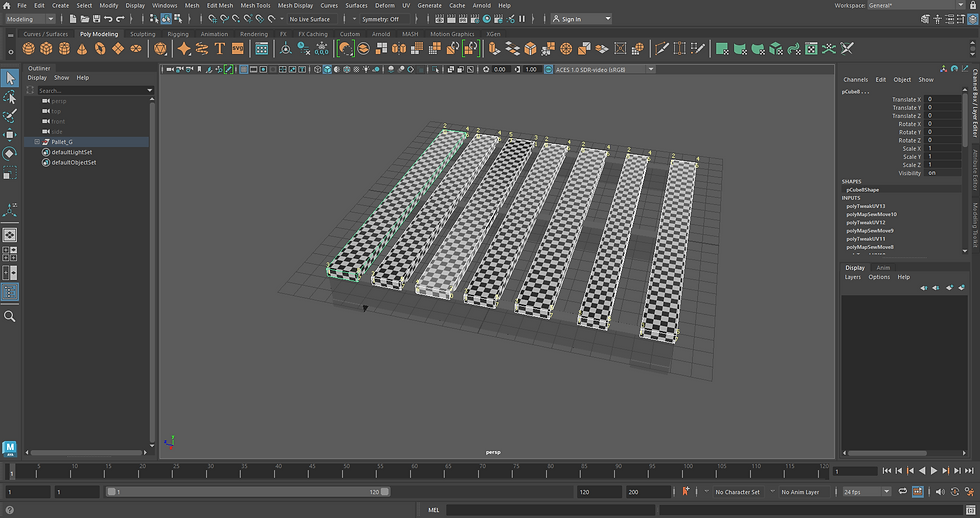
To get the same type of UV Mapping on all the wooden planks first we have to check the component IDs of all the planks. Because the copying of the UV mapping will only work if it has same component ID meaning same vertices. You can check the IDs by going in display then polygons and then Component ID

Here except for one plank all the planks have same IDs. We can transfer the attributes to all of them and make the separate UV shell for the different one. For transferring attributes, we have to go in Mesh then transfer attributes and then select component and then apply. That way we can transfer the shells with the same vertices on other objects as well. Deleting the history of all those objects is also crucial to be able to move the shell around separately in the editor.
Moving on to character mapping and UDIMs, started with the asset file provided by Richard and following along the tutorial he recorded for us. Firstly, I removed all the existing UVs and isolating the body from the clothes. After that to create seams I use 3D cut and sew UV tool to directly cut the seams on the model.

Then I went into UV shell to separate all the UVs from each other however I came across one problem. When I separated the torso, I was supposed to get two different shells based on the cut seams but instead I could only get one shell.

After doing this I realised one of my other mistakes of not creating the seam on arms to flatten it out. I tried doing the seam of torso again, but then I realised my mistake that I didn't do the seams on shoulder to separate the front from the back.
After I unfolded all the shells by clicking on unfold along, I realised some of them didn't unfold the way it should and needed to be. I didn't know how to fix those things, so I decided to practice more and update after overcoming these difficulties.


Comments